Illustratorで水玉模様をつくる方法
Adobeのイラストレーターで水玉模様及びパターンを一から作成する方法を記載。
目次
水玉模様の作成の仕方(その1)
円を描いてスウォッチに登録する方法。
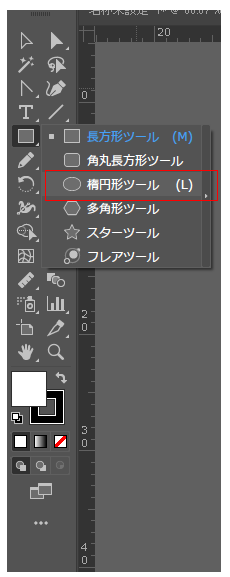
円の作成
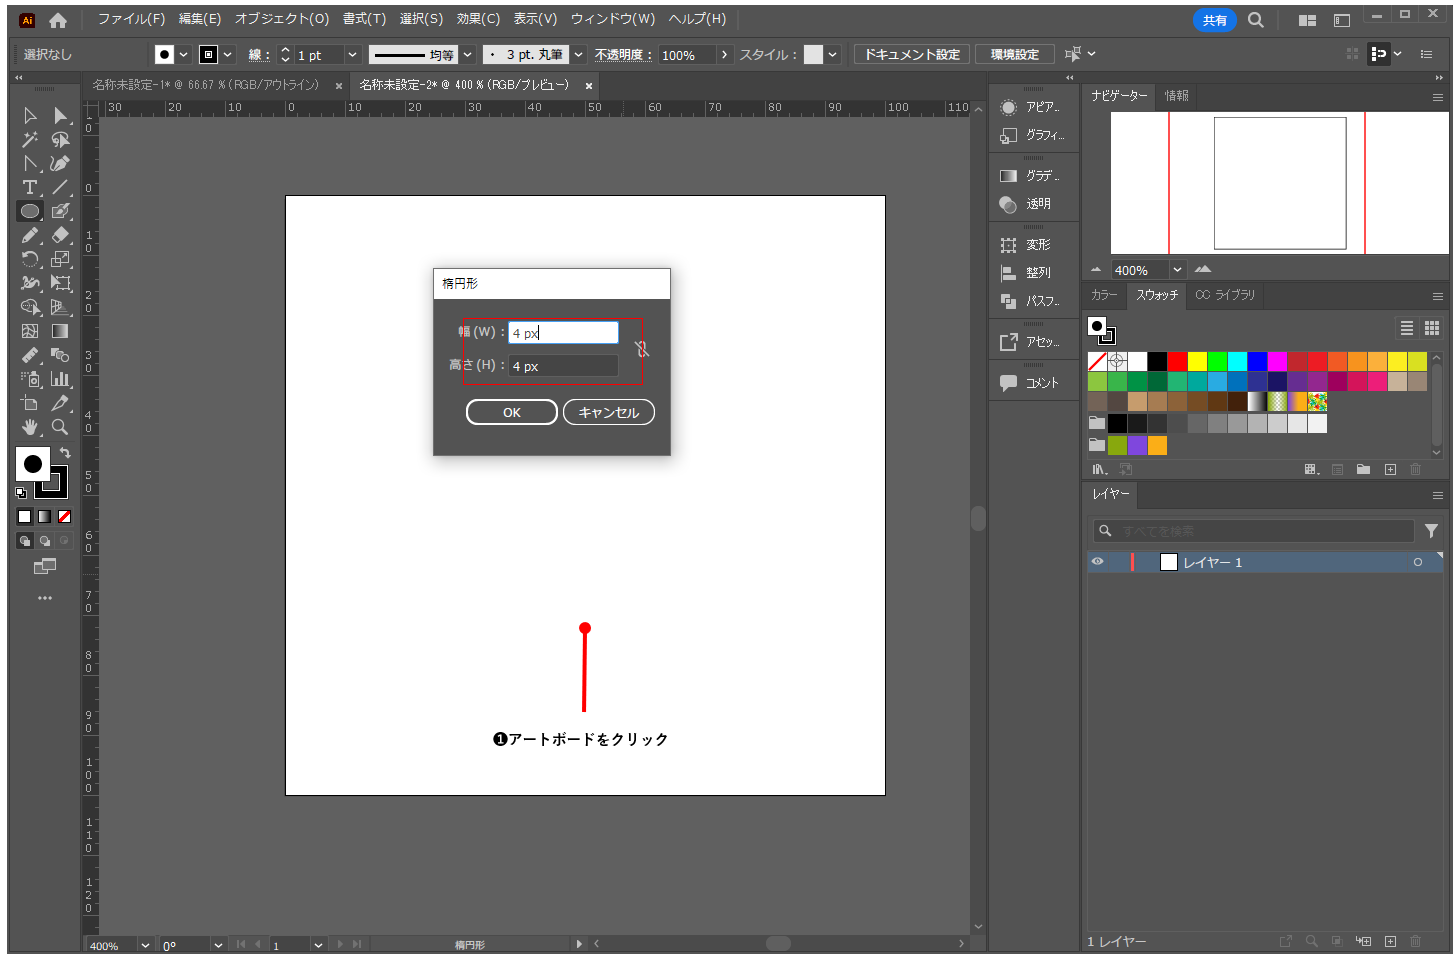
ツールボックスから楕円形ツールを選択します。
アートボードをクリックします。楕円形のウィンドウが表示されますので、ここでは幅(W)4px、高さ(H)4pxと入力して「OK」ボタンをクリックします。
※楕円形ツールをアートボードにドラッグし適当なサイズを作成してからコントロールパネルで幅、高さを調整することもできます。
アートボードに円が作成されます。
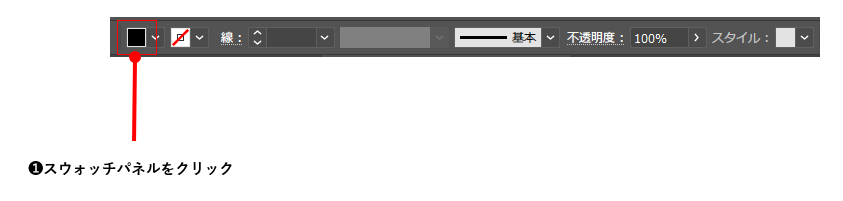
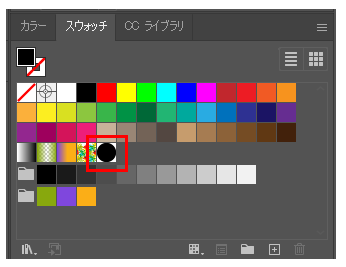
コントロールパネルのスウォッチパネル(❶)で塗りの色を指定します。ここでは、黒を選択して円を塗りつぶしてます。
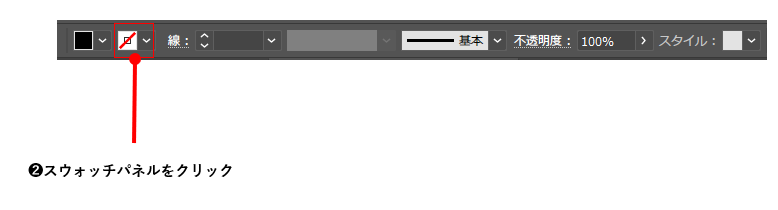
スィッチパネル(❷)で線なしにします。
パターンとして登録
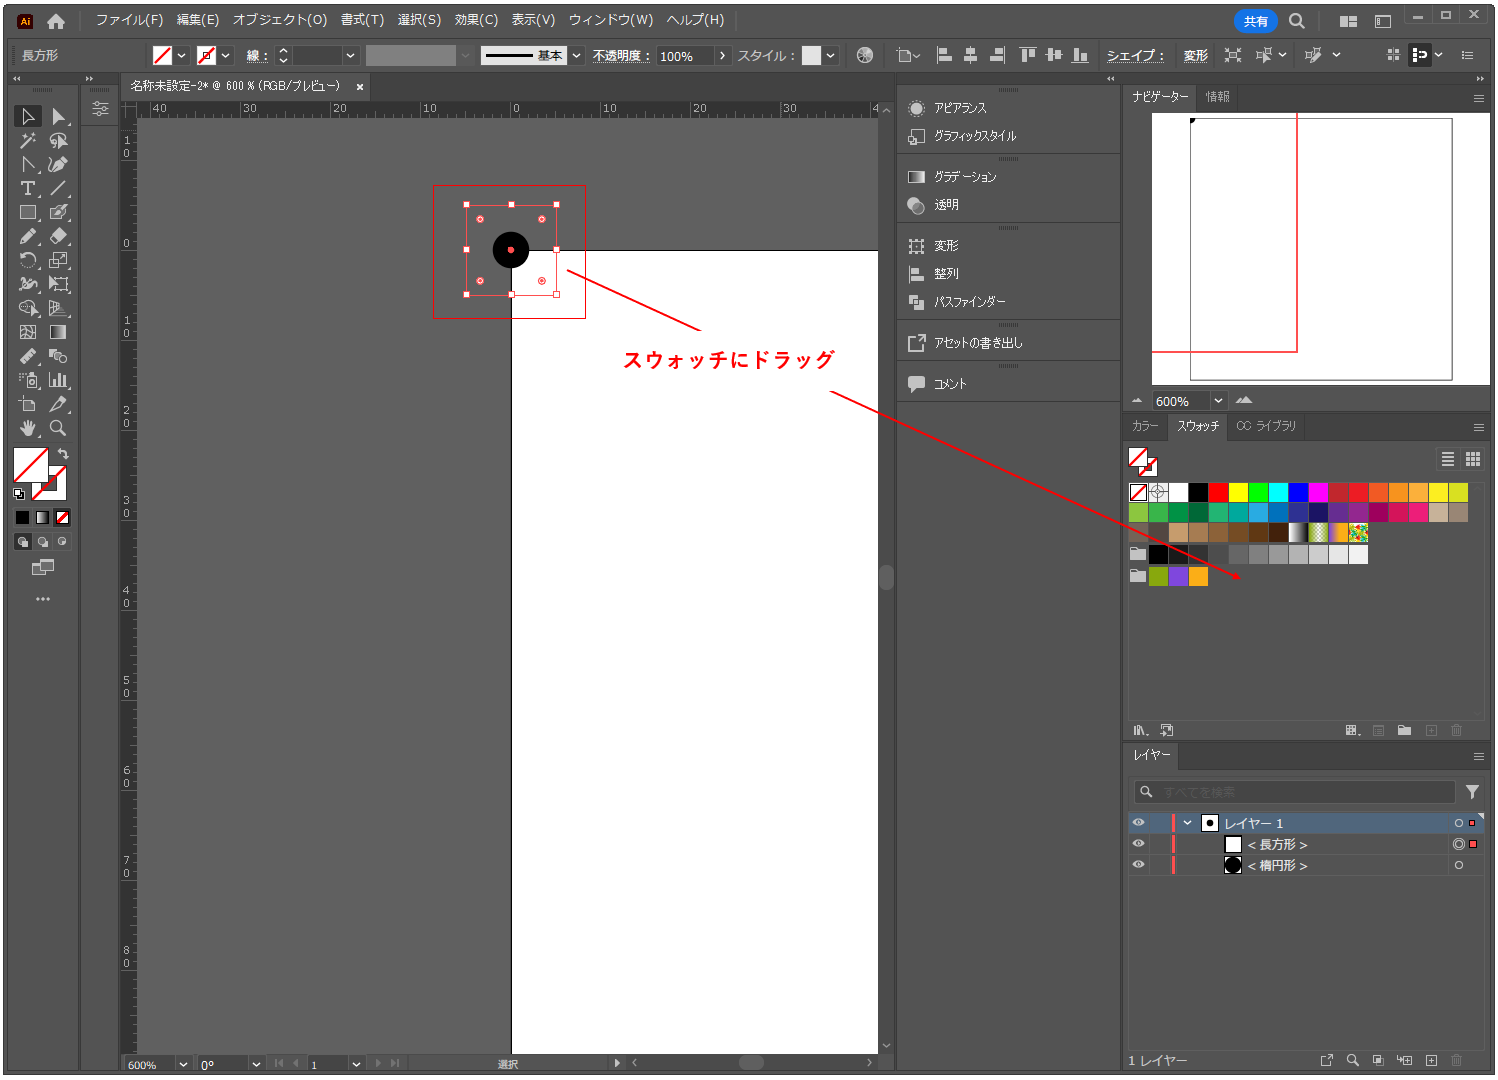
オブジェクトを選択します。
スウォッチパネルにドラッグします。
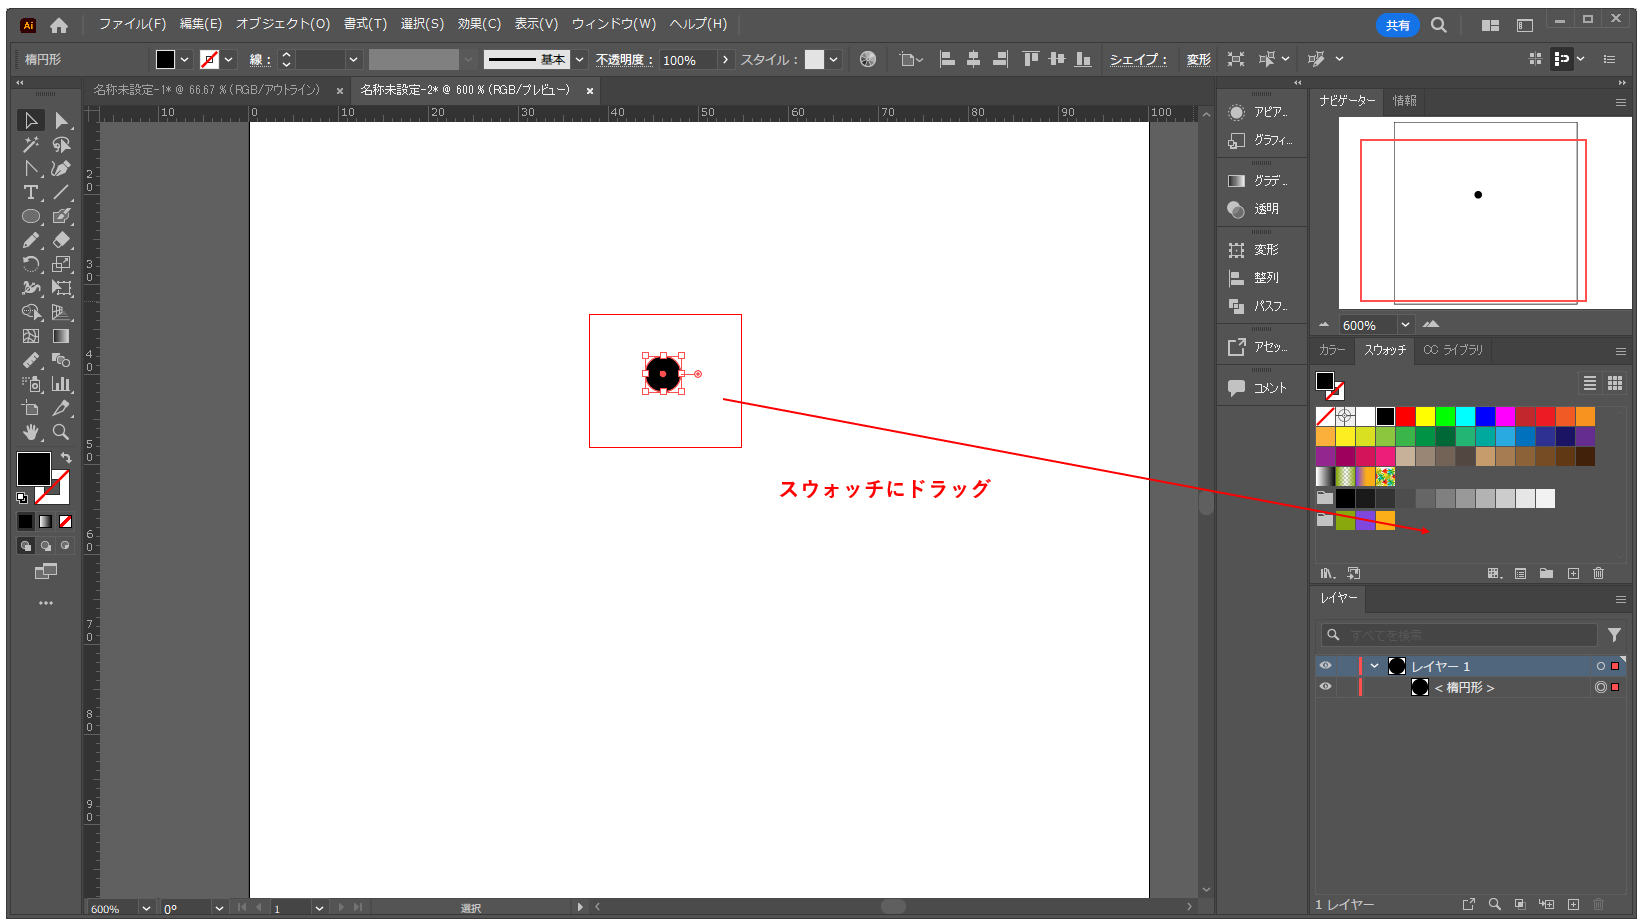
スウォッチに登録されます。
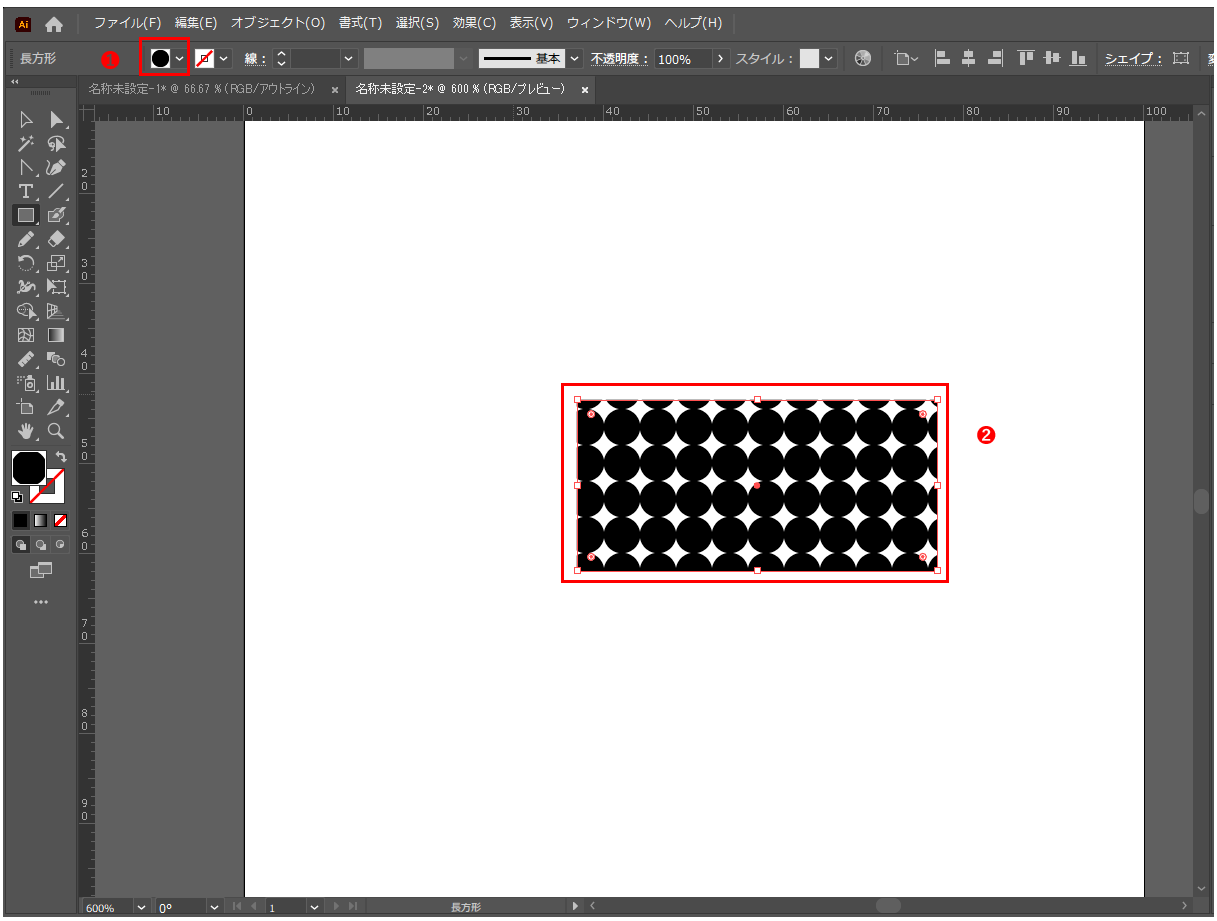
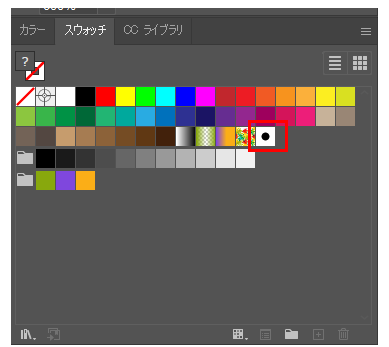
長方形を選択し、コントロールパネル(❶)で登録した水玉パターンの「塗り」を選択することで、長方形に水玉パターンが適用されます。
水玉模様の作成の仕方(その2)
その1では水玉同士の間隔がないため、間隔を空けるやり方を説明します。パターン枠を使用します。
まず、その1の円の作成をします。
ツールバーから選択をクリックします。円をクリックします。

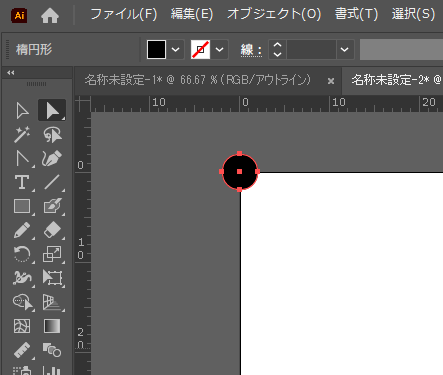
コントロールパネルのXとYに0pxと入力します。

アートボードの左上に円が移動します。
正方形の作成(パターン枠)
幅(W)10pt/高さ(H)10ptの正方形を作成します。ツールバーから長方形をアートボードにドラッグします。
コントロールパネルのXとYに0pxと入力します。正方形にするために、W(幅)とH(高さ)にそれぞれ10pxと入力します。

ウィンドウ幅が狭い場合は、コントロールパネルにX、Y、W、Hが表示されないことがあるので、その場合は、メニュー→ウィンドウ→プロパティをクリックして設定します。
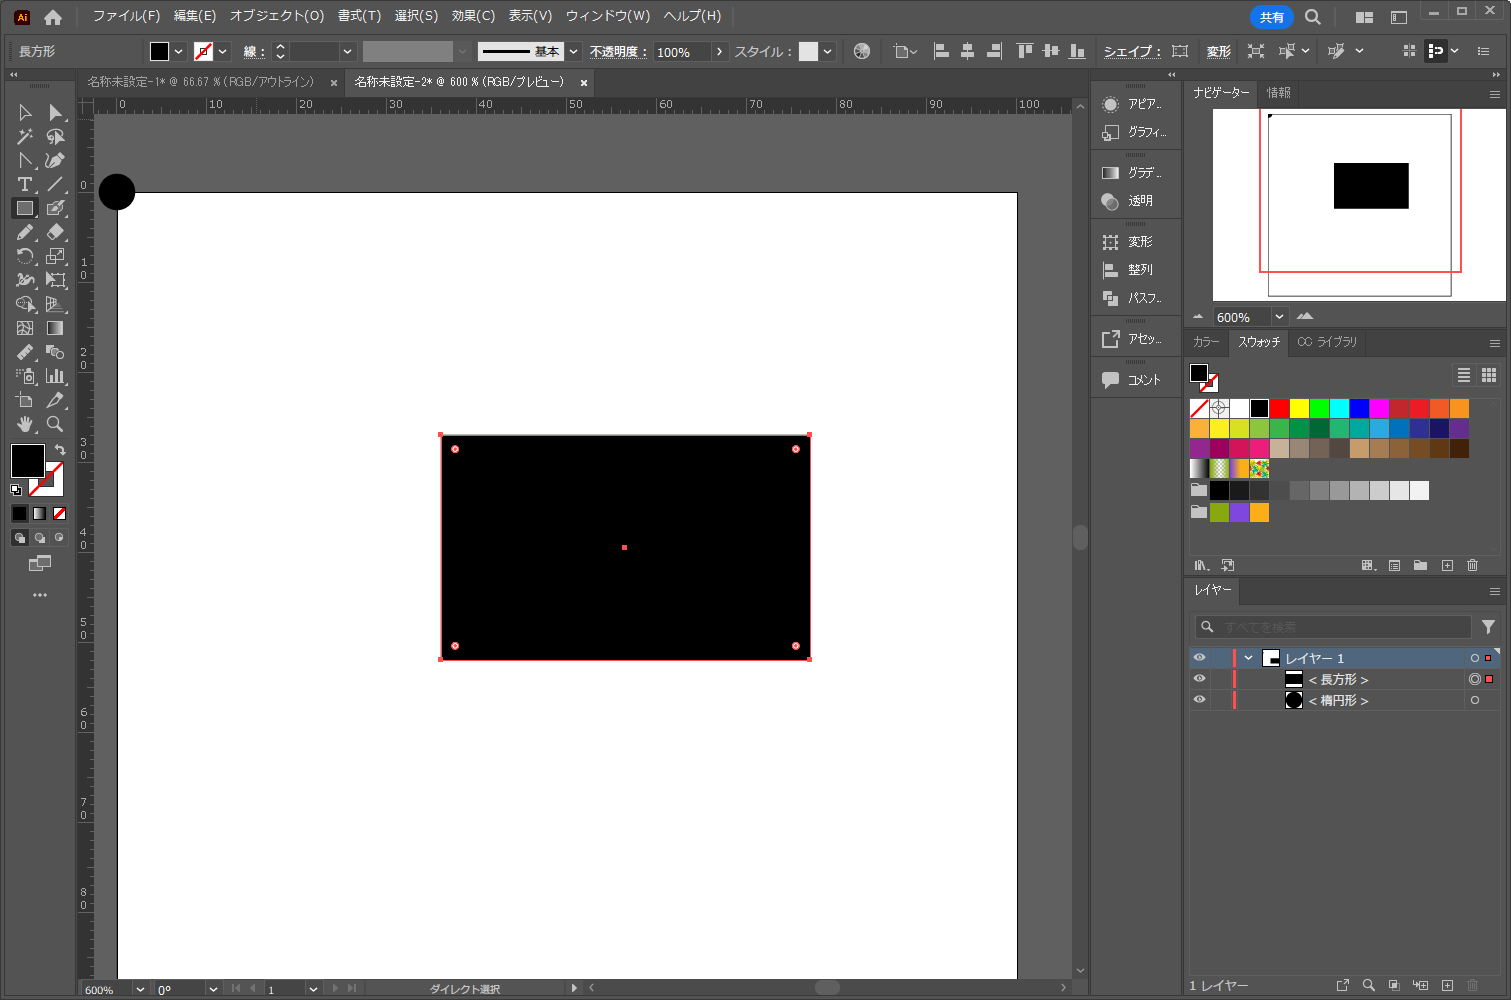
コントロールパネルの塗りと線のスウォッチは、なしに設定します。

以下のように円がパターン枠の中心となります。その状態で、円とパターン枠をスウォッチにドラッグします。※ドラッグで円とパターン枠をまるっと囲う選択方法がオススメです。
スウォッチに登録されます。
長方形を選択し、コントロールパネル(❶)で登録した水玉パターンの「塗り」を選択することで、長方形に水玉間隔が開いたパターンが適用されます。
水玉模様の作成の仕方(その3)
円の作成
その1で作成した手順で円の作成をします。作成した後にコピー&ペーストで円を4個作成します。(計5個)
※コピーアンドペーストは、円を選択し編集→コピー→ペースト等を使用して作成します。
パターン枠の作成
(その2)に記載した手順で作成します。
位置調整
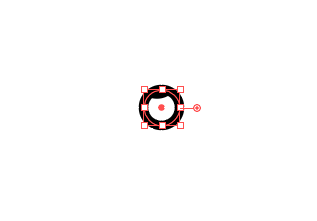
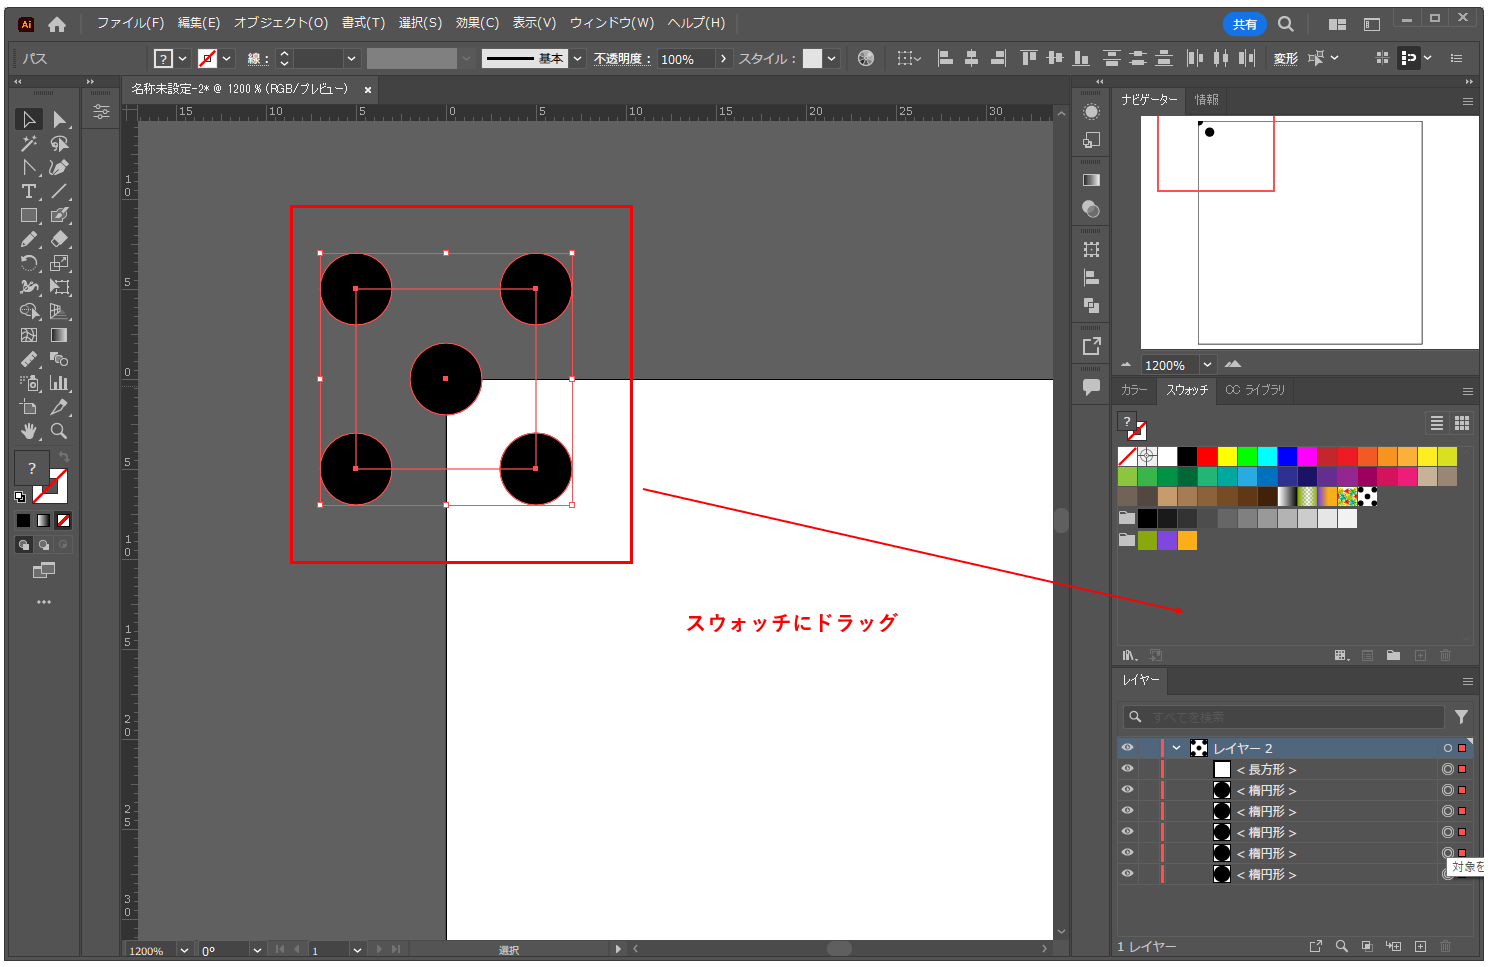
スゴロクの5を作るように、円の中心とパターン枠の角が一致するように調整します。
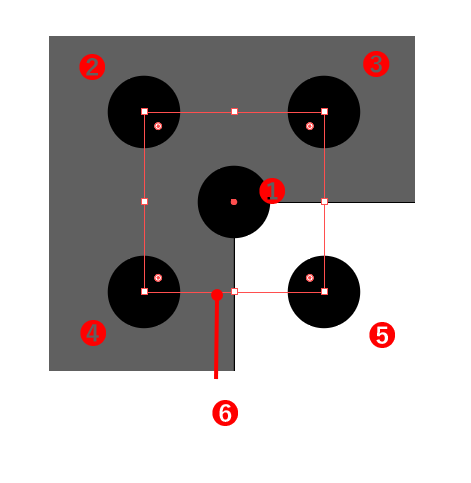
各円のオブジェクトを選択しコントロールパネルに下記の値を入力します。
- ❶W:4pt/H:4pt X:0pt/Y:0pt
- ❷X:-5pt/Y:5pt
- ➌X:5pt/Y:5pt
- ❹X:-5pt/Y:-5pt
- ❺X:5pt/Y:-5pt
- ❻W:10pt/H:10pt X:0pt/Y:0pt(パターン枠)
[個別に変形]を利用すると、サイズ違いのドットパターンを手軽につくることができます。円のみ選択したあと、[オブジェクト]メニュー→[変形]→[個別に変形]を選択します。[拡大・縮小]の[水平方向]と[垂直方向]の比率に同じ値を設定すると、それぞれの円の中心をずらすことなく縮小できます。
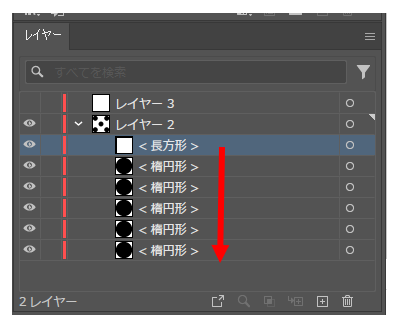
パターン枠のレイヤーをドラックで一番下に移動させる。
作成した円とパターン枠をスウォッチに登録します。
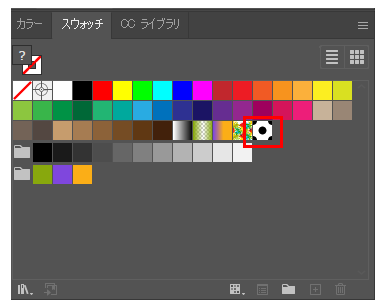
スウォッチに登録されます。
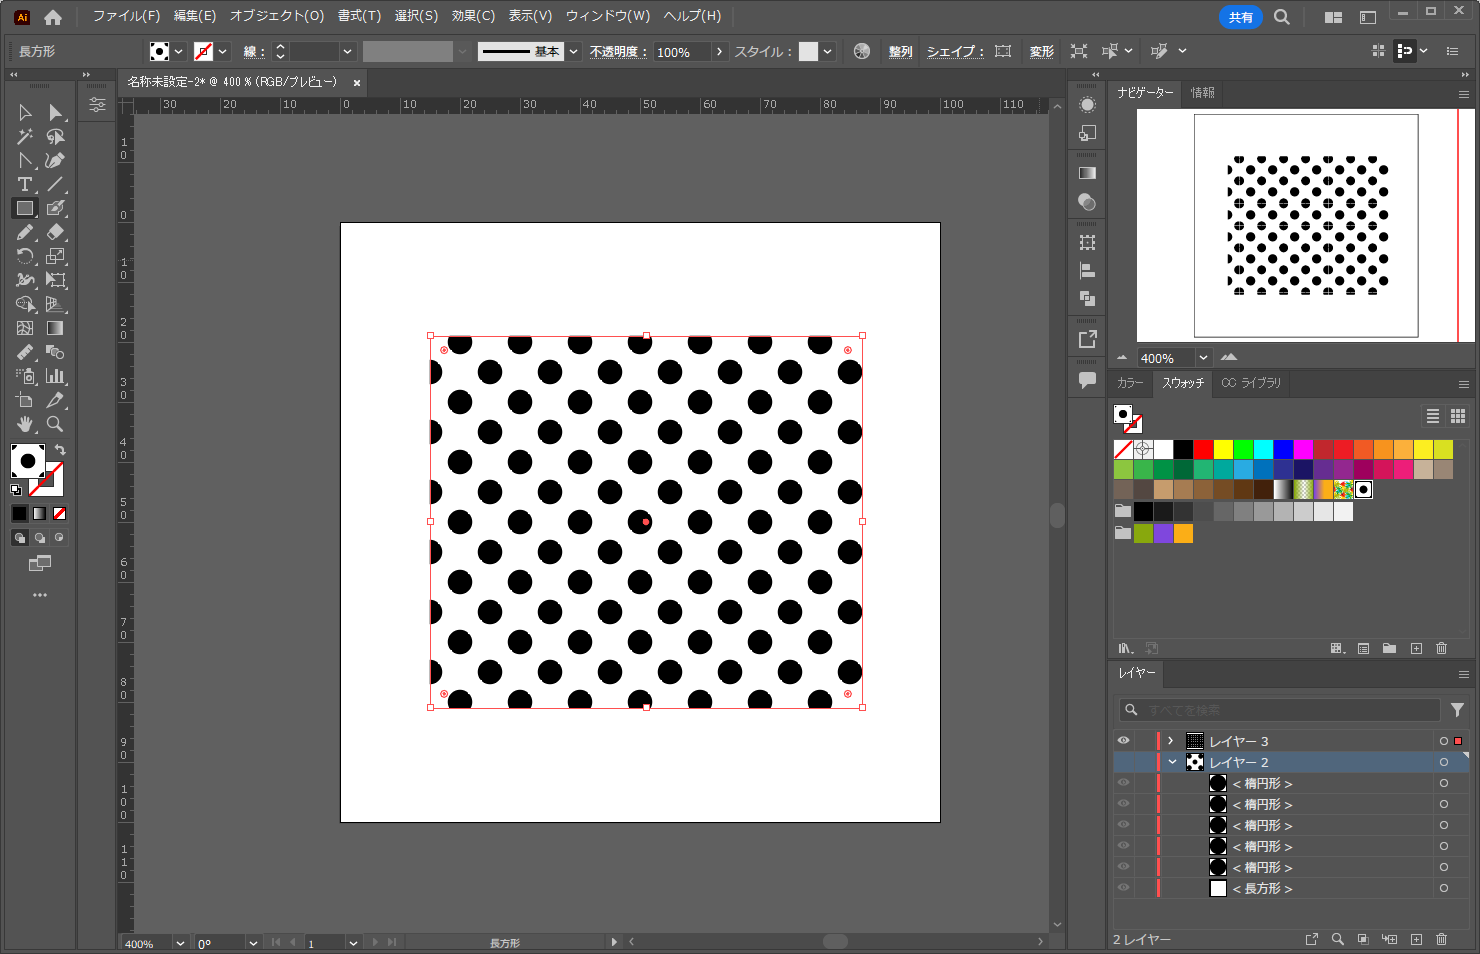
作成した水玉パターンをパスに適用することができます。
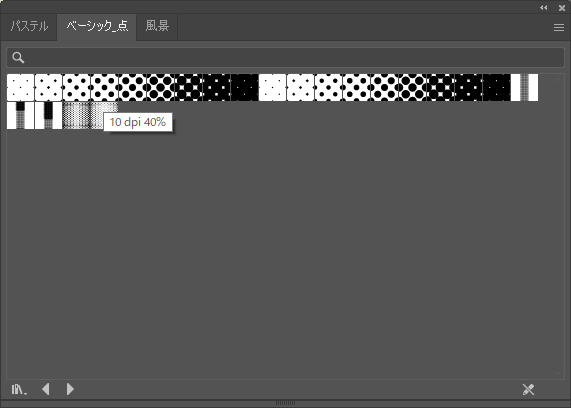
スウォッチライブラリを使用する(その4)
[ウィンドウ]メニュー→[スウォッチライブラリ]→[パターン]→[ベーシック]→[ベーシック_点]を選択します。
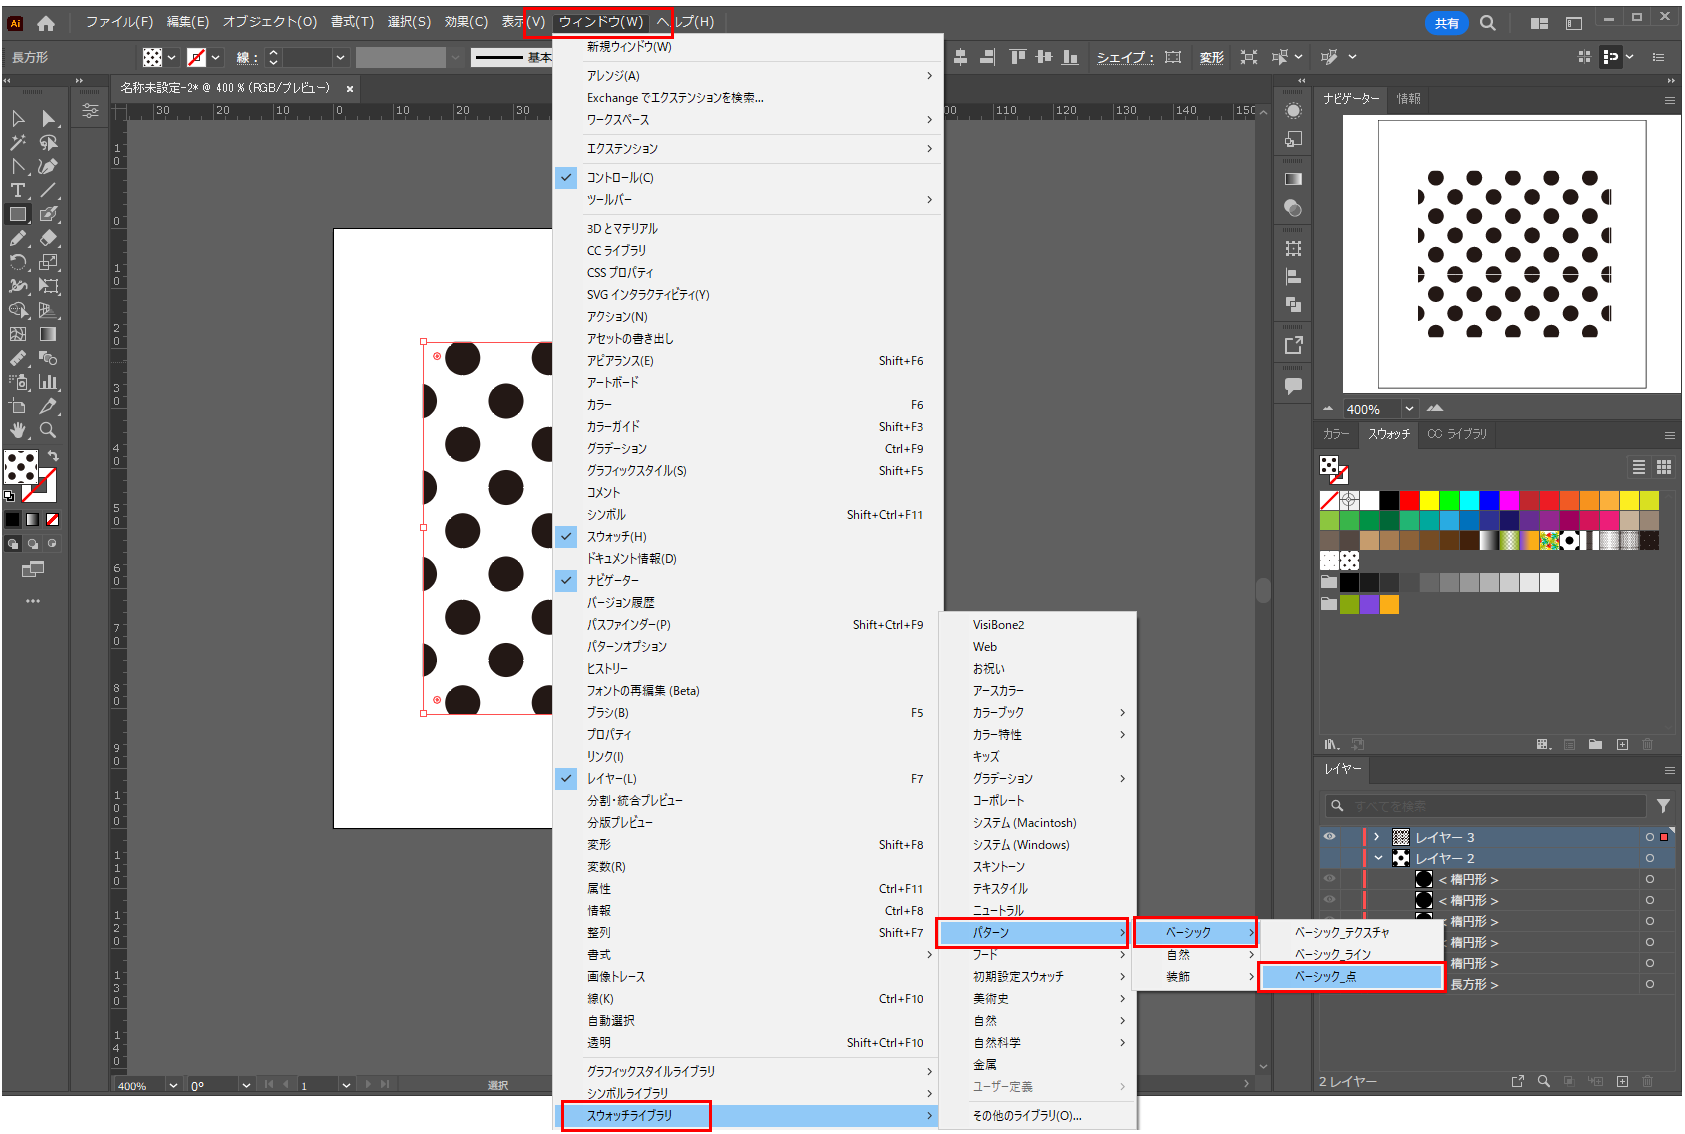
[10dpi 40%]をクリックしてパスに適用します。